|
Who are we? I am a retired college instructor. I spent over twenty years teaching electronics at a technical college, and during that time I enjoyed teaching but to relieve the stress of teaching I also enjoyed my hobbies of woodworking, lapidary, and art. Together my daughters and I have built a business out of this, where by we have created the process for inlaying cut stones into exquisite mosaic works of art. We have spent over ten years perfecting this process. Notice the quality of workmanship, the rich colors crated by the stones, and how the colors and texture of the stones work together to enhance these pieces of art. Our mosaic tables also have this same quality and workmanship. If you like our work let us know
through either of our email addresses at: eldonconder@hotmail.com or Krosfistofie@gmail.com.
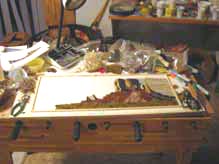
The process we use is to first select the picture that we wish to immortalize through stone and then select the stones. We look for stones with color, patterns, and light refraction to fit the picture. We next slice the stones.

Our next step is to lay out the stones into a creative piece of mosaic art.
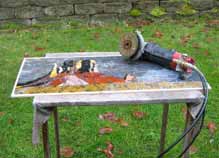
After we have laid out all the stones we cover the backside in fiber glass and epoxy, after it hardens we grind out any imperfections and then cover the front side with a clear plastic finish. After all of the work has been
completed, it is now ready to be framed or put into a
tabletop.
|